Course Description
CAD 1 is a course that offers mechanical drawing and Computer Aided Drafting, or CAD for short. Students will first learn some skills of mechanical drawing, and then move into using CAD programs, such as AutoCAD and OnShape. Using both methods, the student will learn to dimension the drawing. Using CAD, not only will the student learn to dimension, but will use AutoCAD to make 3 view drawings. Using OnShape, the student will learn how to create auxiliary and section views. This course is useful for any student who wants to enter types of fields such as any form of engineering. I enjoyed learning to use CAD the most during this course because it was easy to use once I learned how to use it, which was relatively simple. Once I learned how to use the CAD programs, I was able to successfully create the drawings needed for the class.
Three Major Drawing Styles
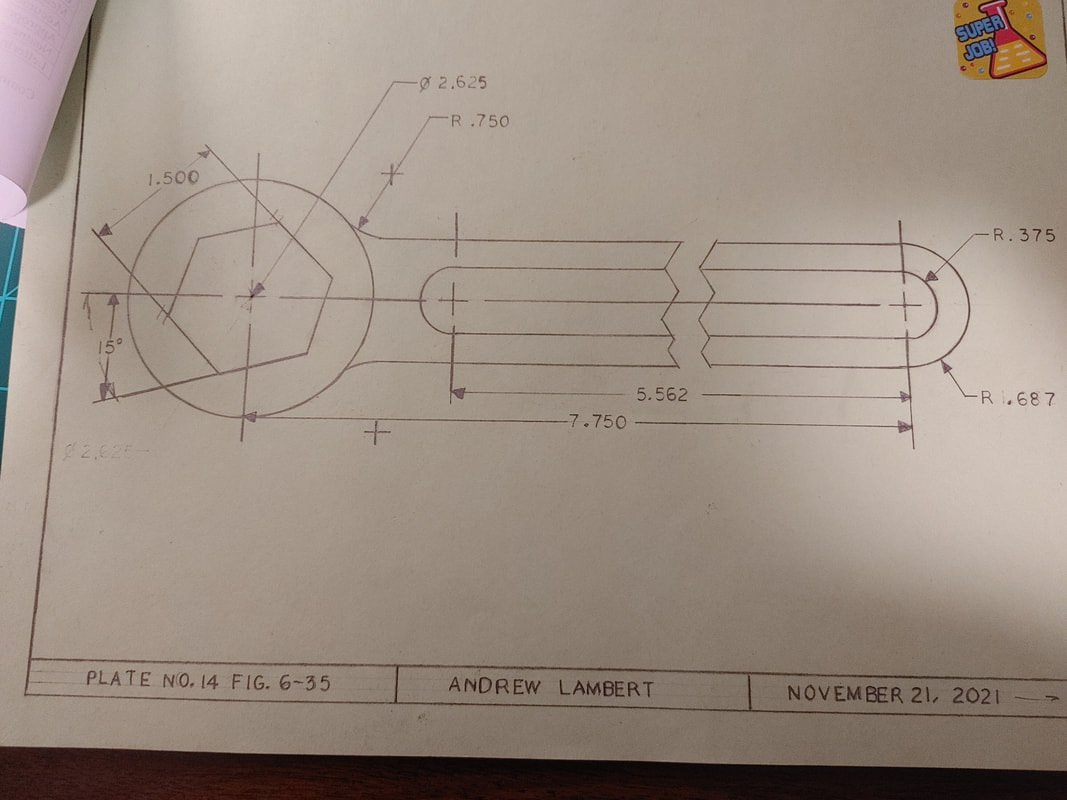
Mechanical
Mechanical is the use of hand tools on paper to create the drawing. While it is not as common to use anymore, it is still essential for the use of CAD systems. Some things that are necessary for mastering this skill are the ability to measure, the ability to keep the drawing neat and clean, and math skills just to name a couple. Students will also learn the technique of lettering the drawing by hand.
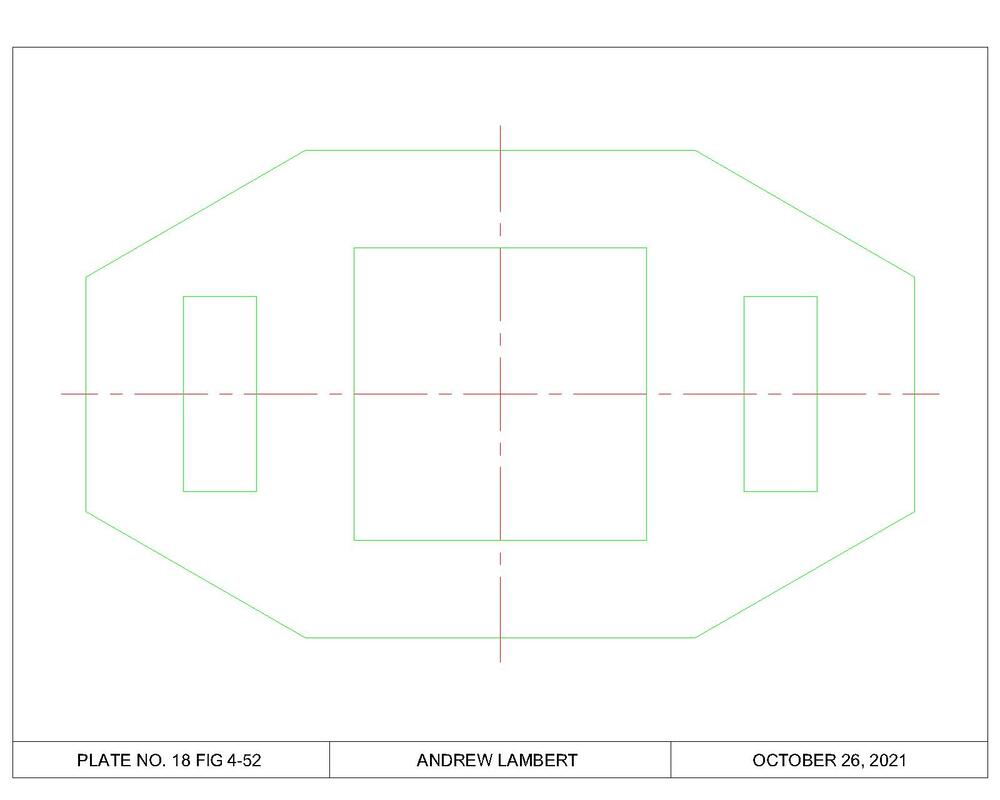
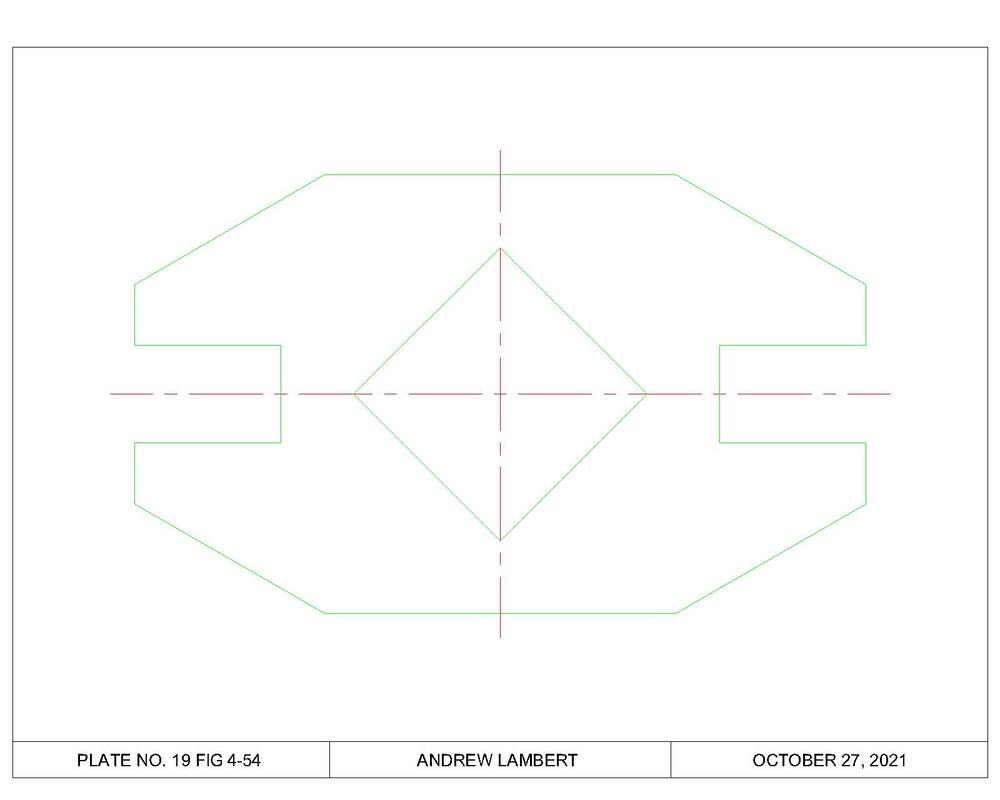
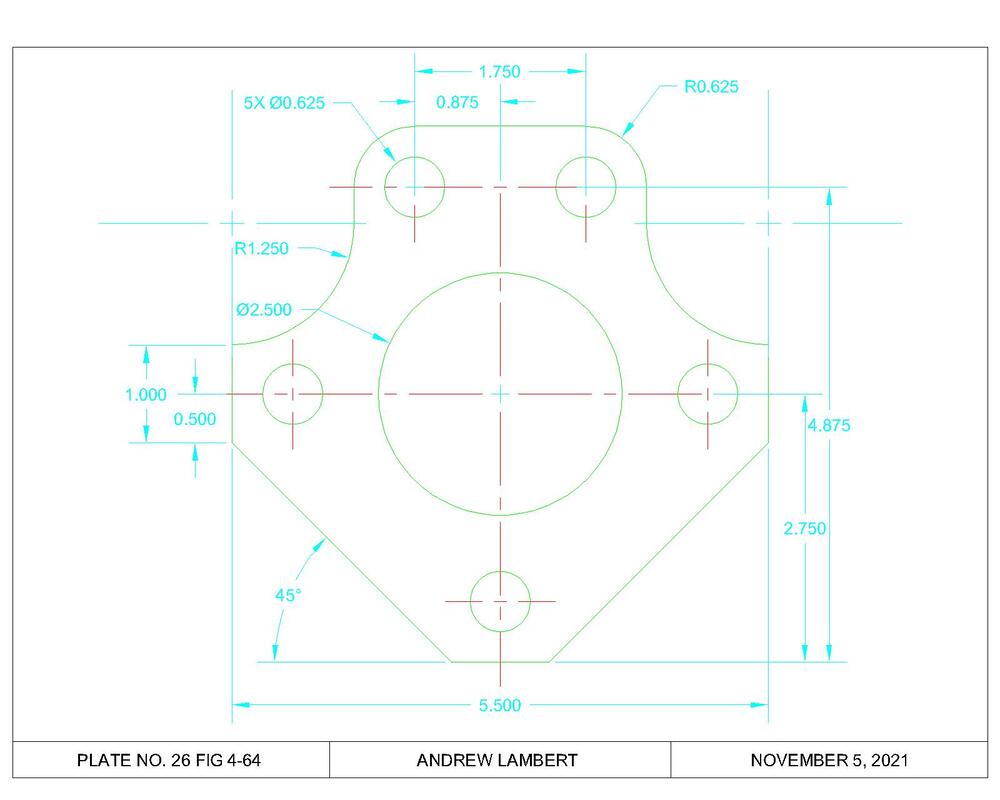
CAD (2D)
In this course, 2 different styles of CAD are used, being 2D and 3D. 2D CAD is similar to mechanical drawing in the way it is laid out. The drawing is in the middle of the drawing area, similar to mechanical drawings. CAD, however, is more accurate. While the user of the program must still do a lot of the work, the computer assists in a lot of necessary actions, such as snapping on to other parts of the drawing. Math skills are crucial for creating these drawings.
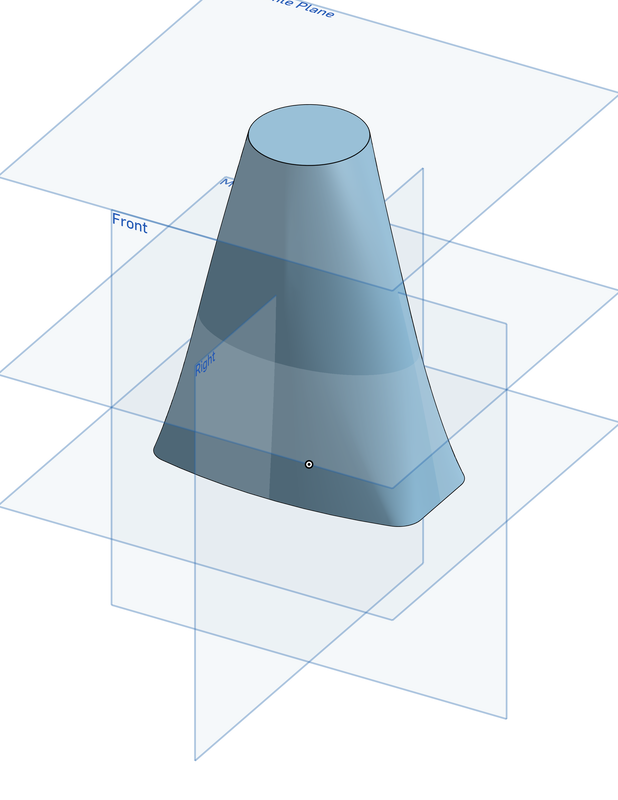
CAD (3D)
The other form of CAD that is taught in this course is 3D parametric modeling. 3D CAD is a good way to help better visualize the part or object that is to be created, as you can see what it looks like before it is physically produced. It is first drawn on one plane as a 2D drawing, but then it can manipulated into becoming 3D. 3D modeling software is also helpful for 3D printing, as they can be converted into the files that the printer requires to produce it. When the object is finished, it can be put on a drawing where it shows multiple views, including an isometric view.
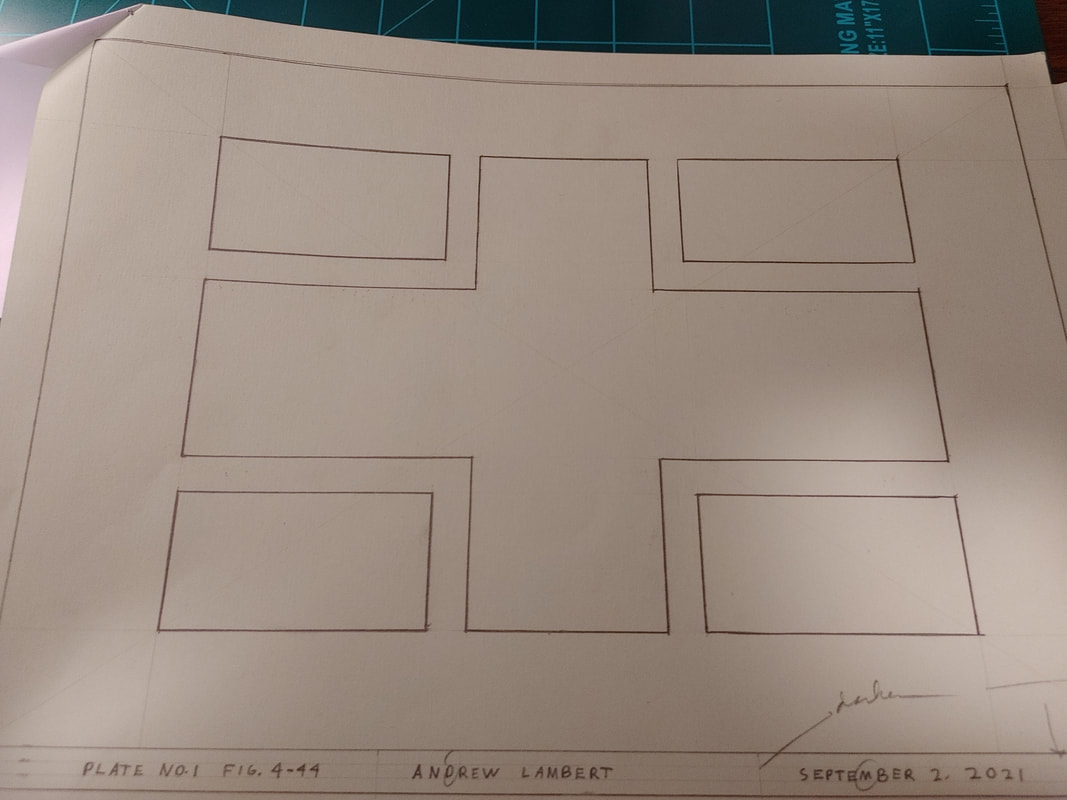
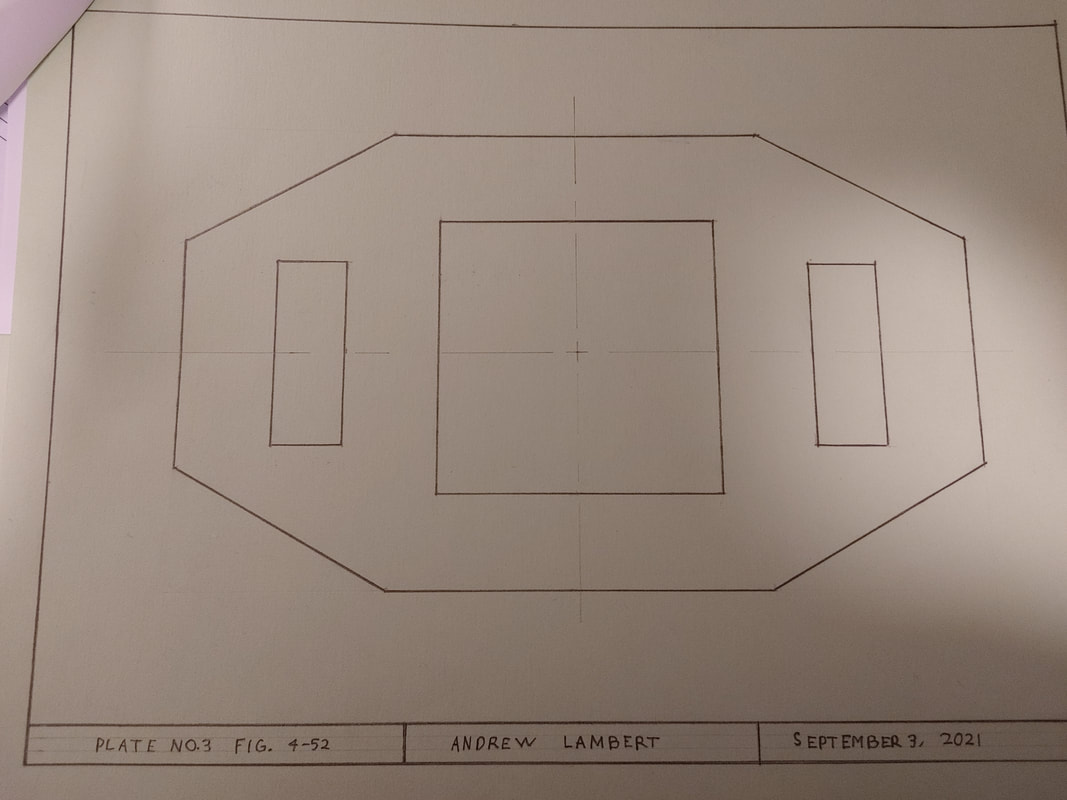
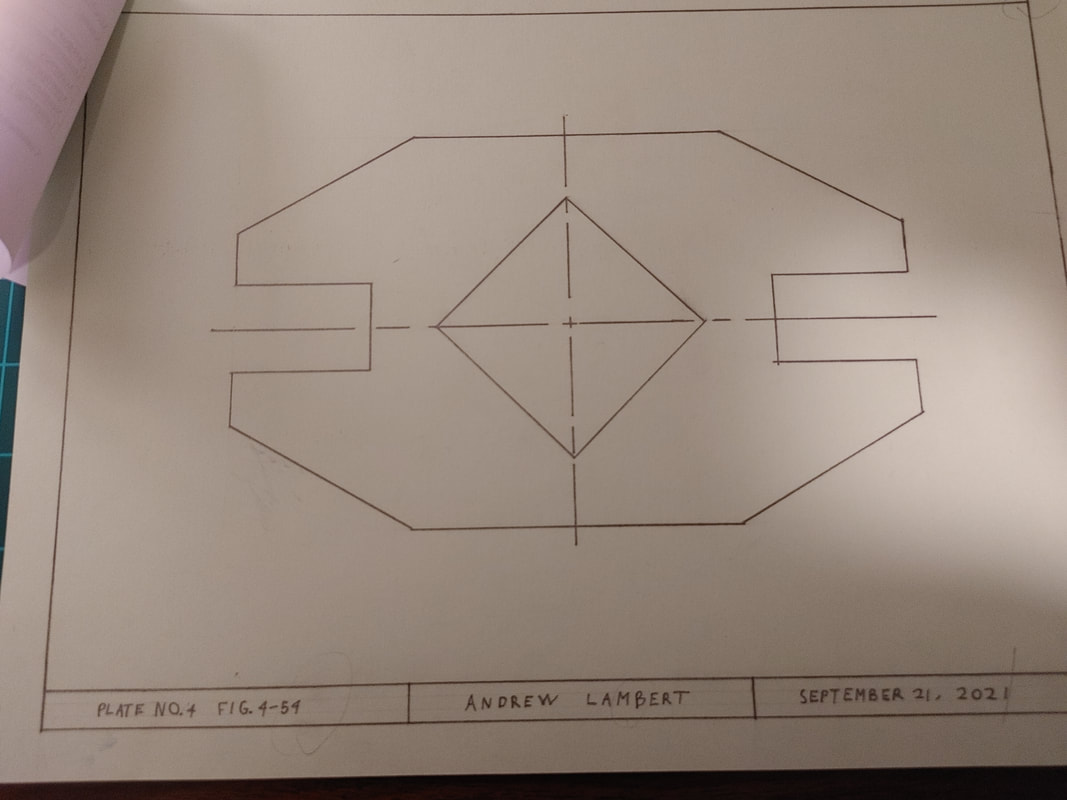
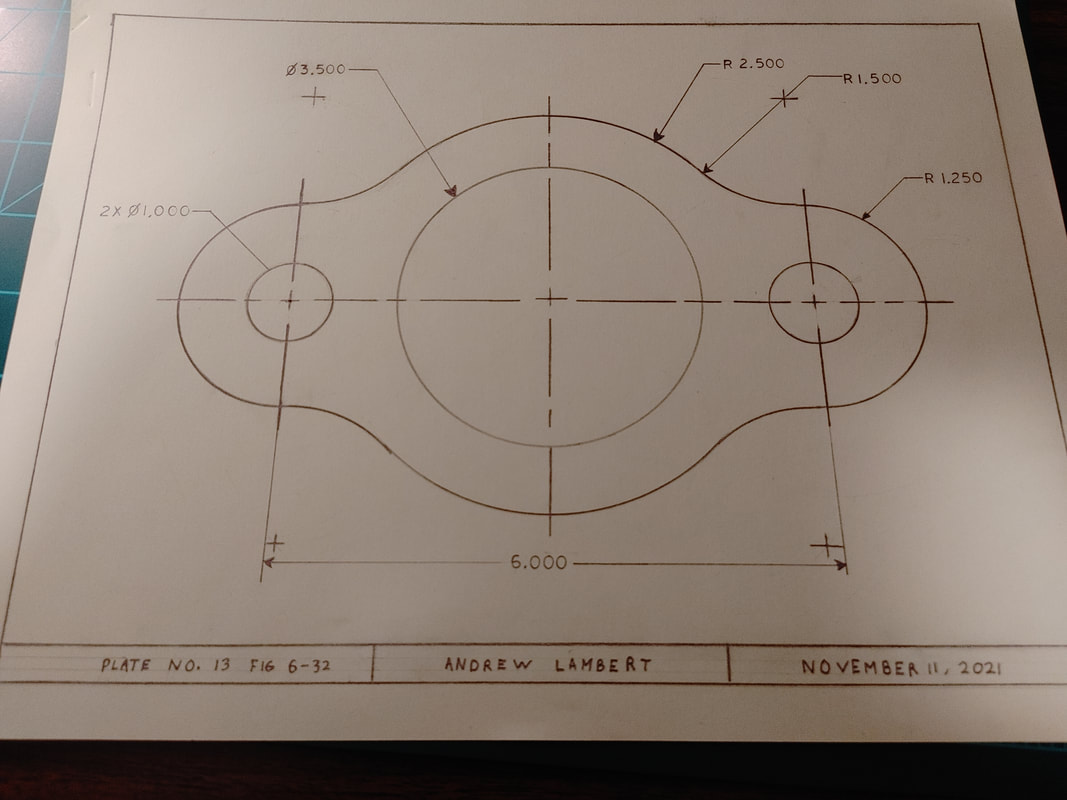
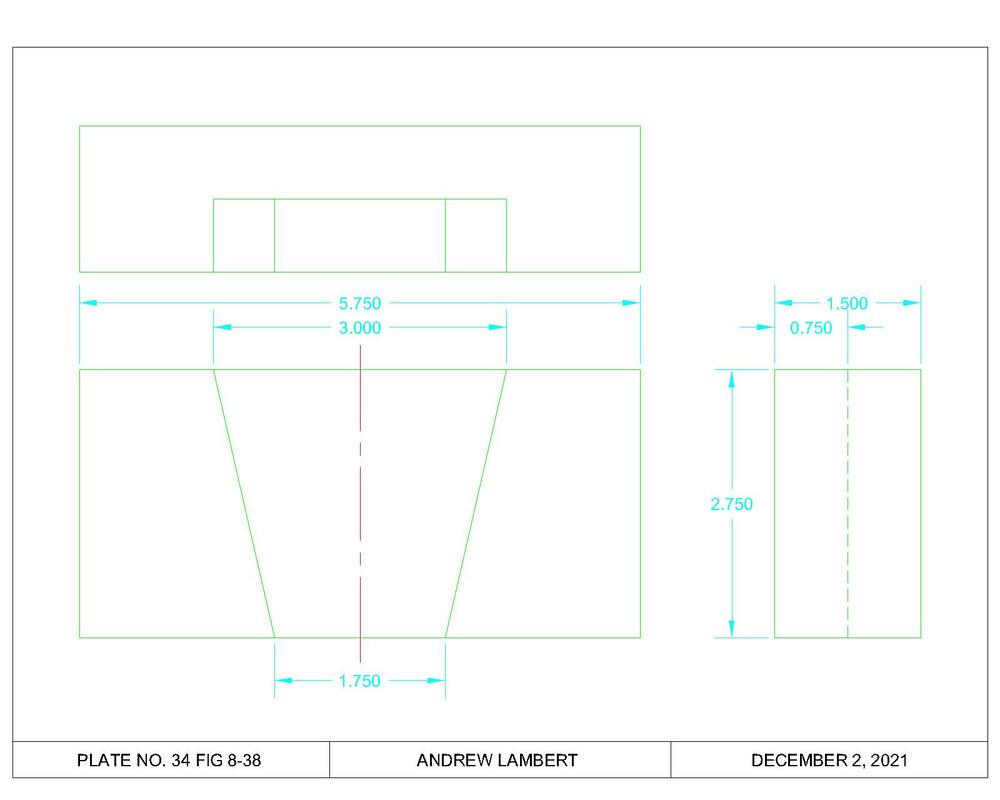
Mechanical Drawings
3 without Dimensions
2 with Dimensions
AutoCAD (2D)
2 Single Views without Dimensions
1 Single View with Dimensions
1 Orthographic Projection
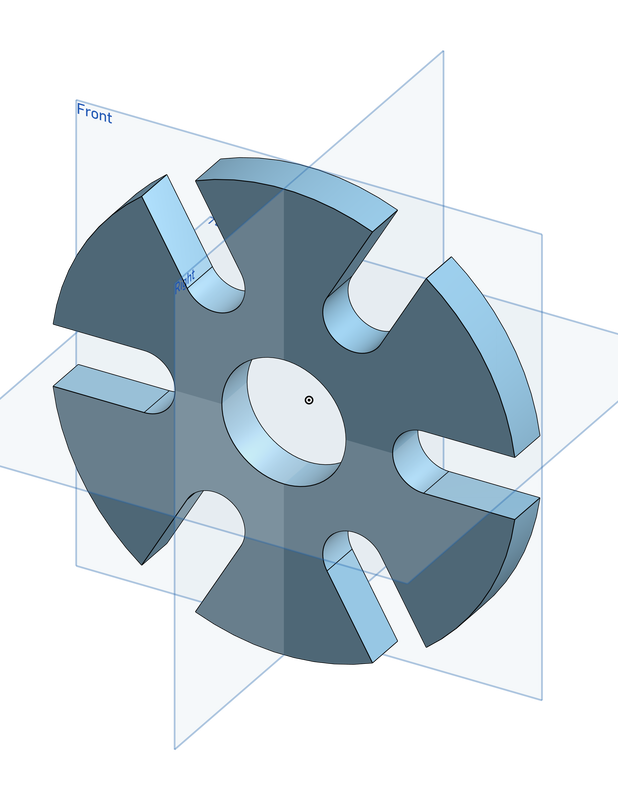
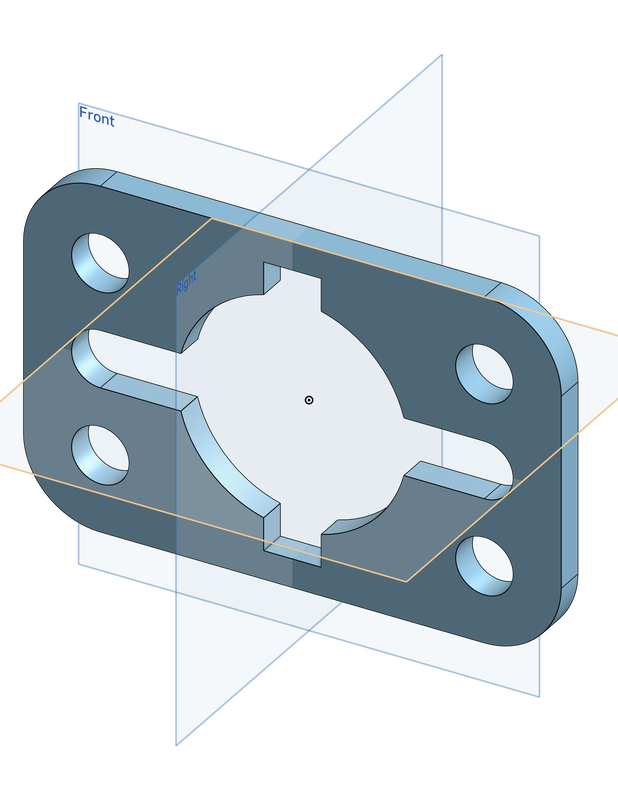
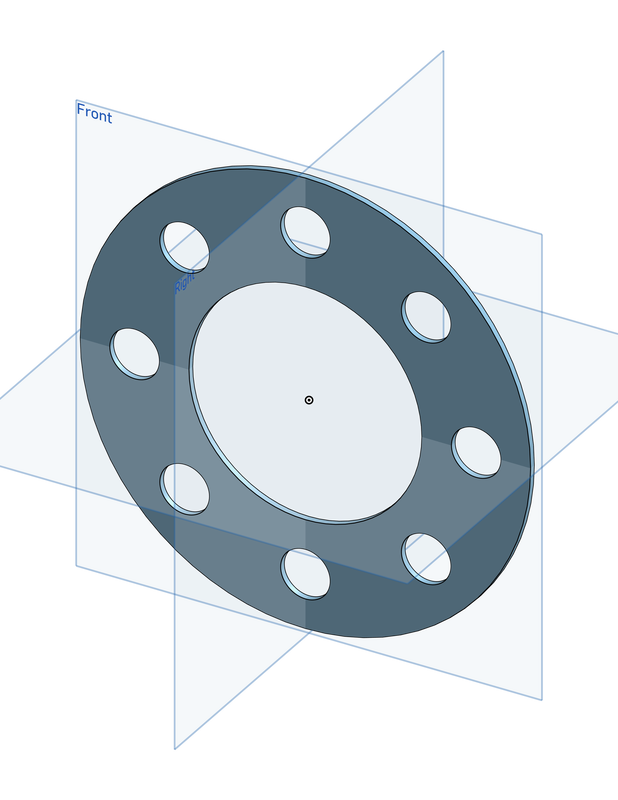
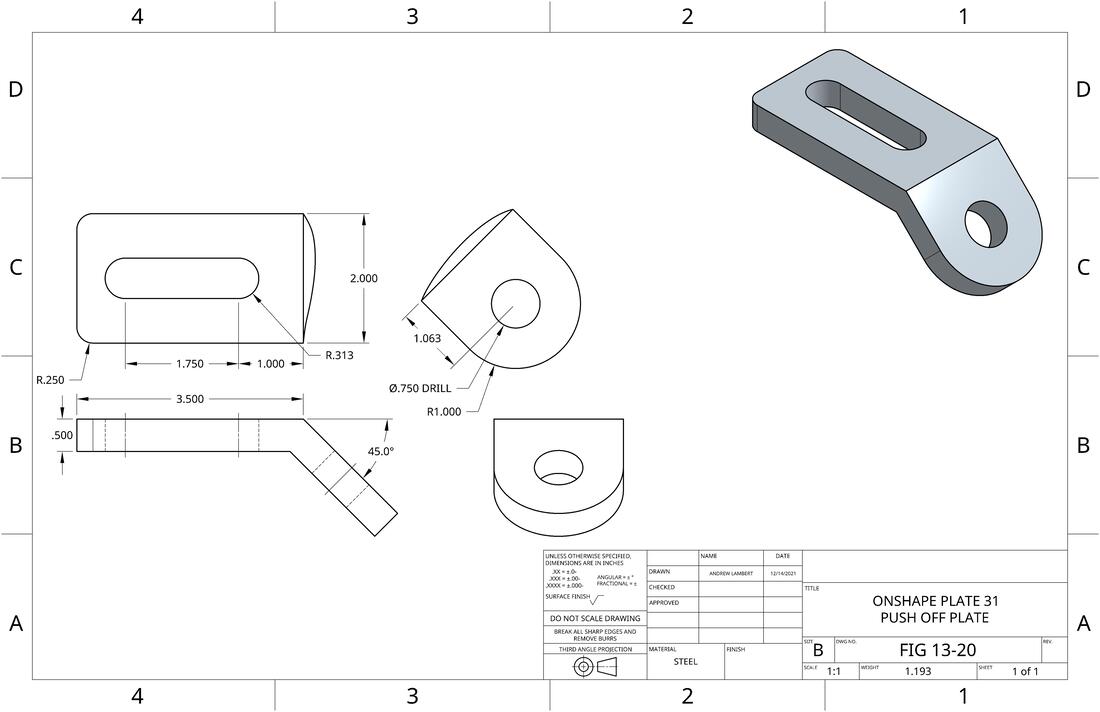
OnShape (3D)
3 Working Drawings
2 Exercises

3 Working Drawings with Isometric
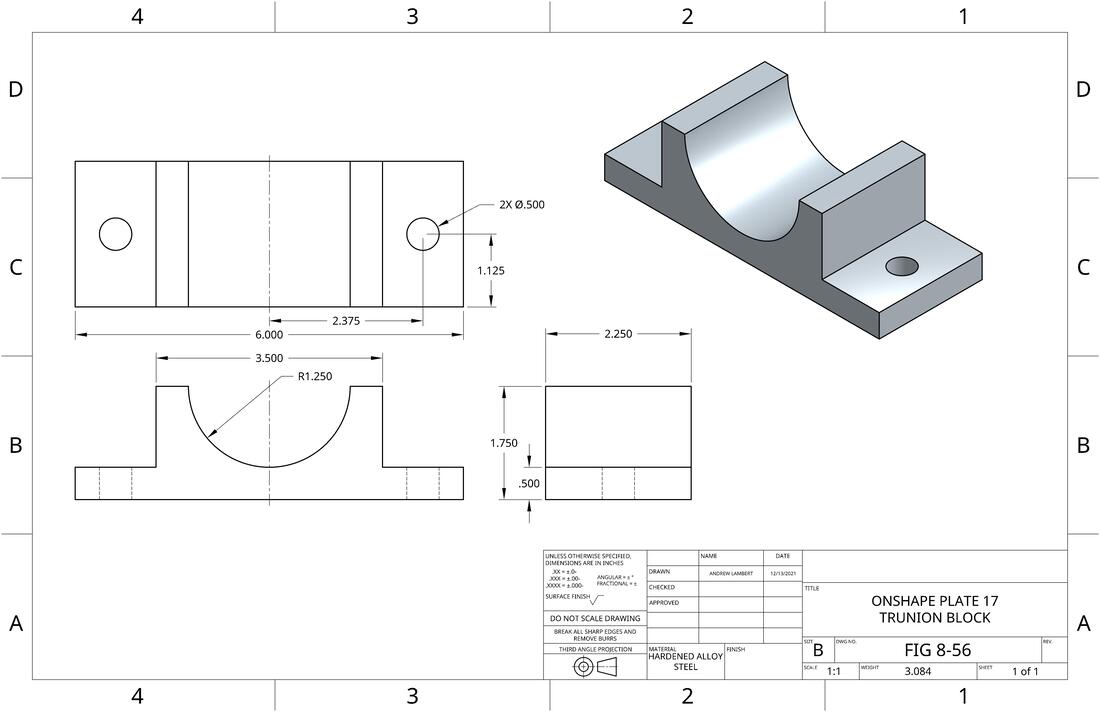
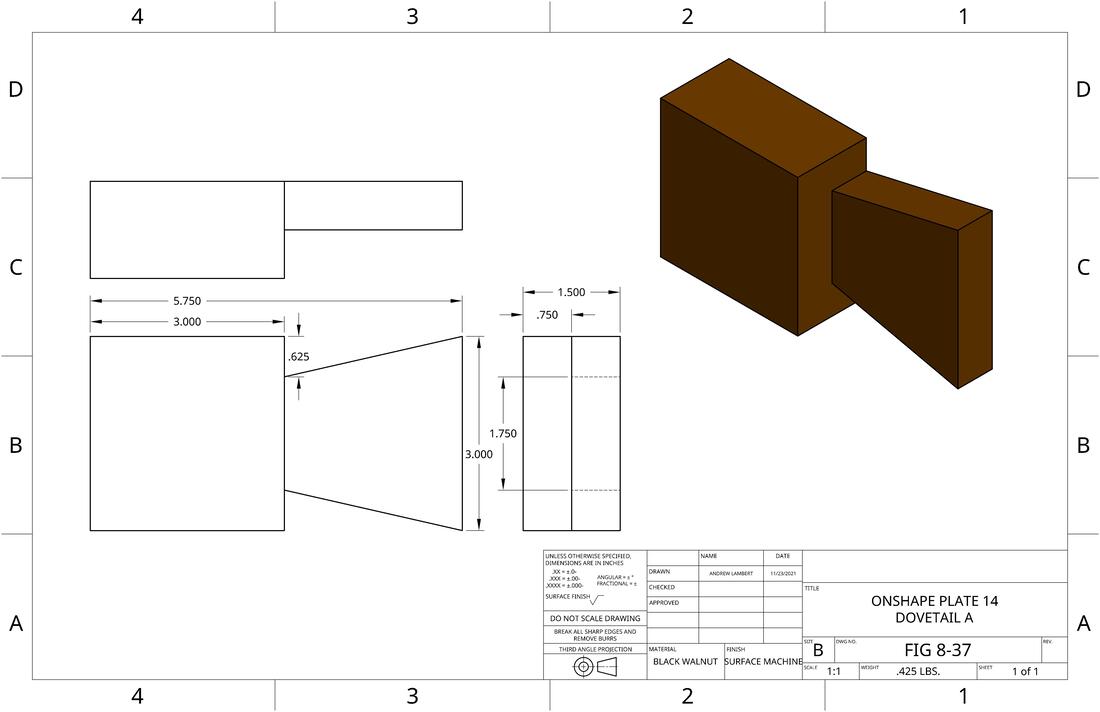
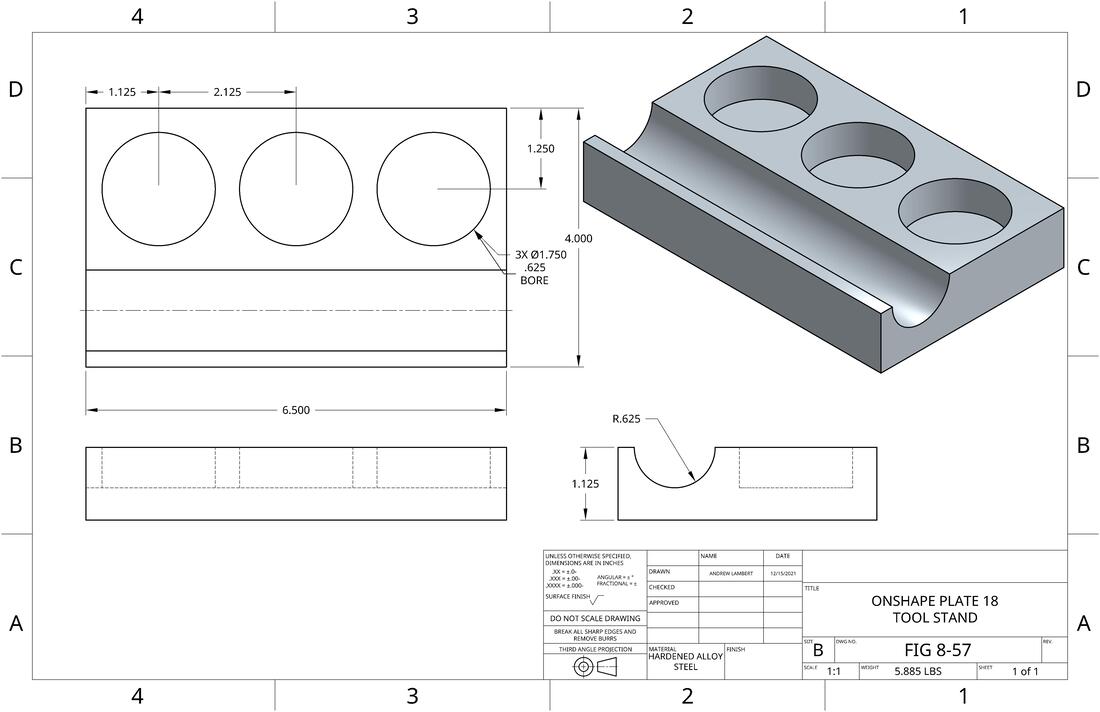
1 Section
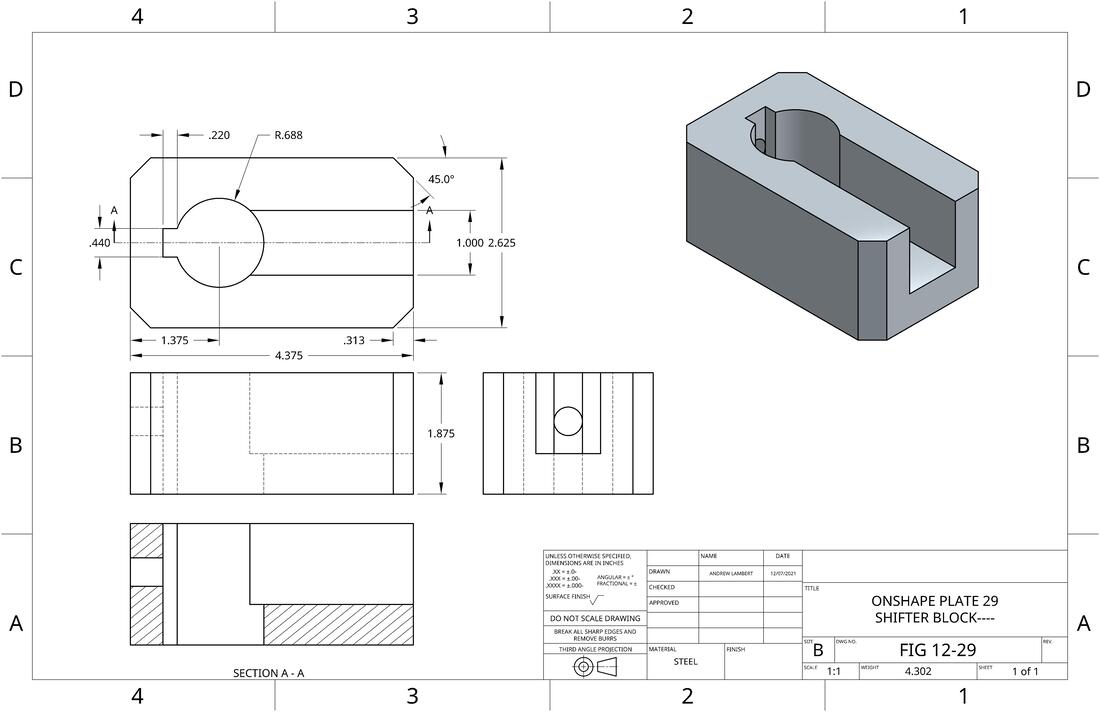
1 Auxiliary
Other Items Relating to the Course
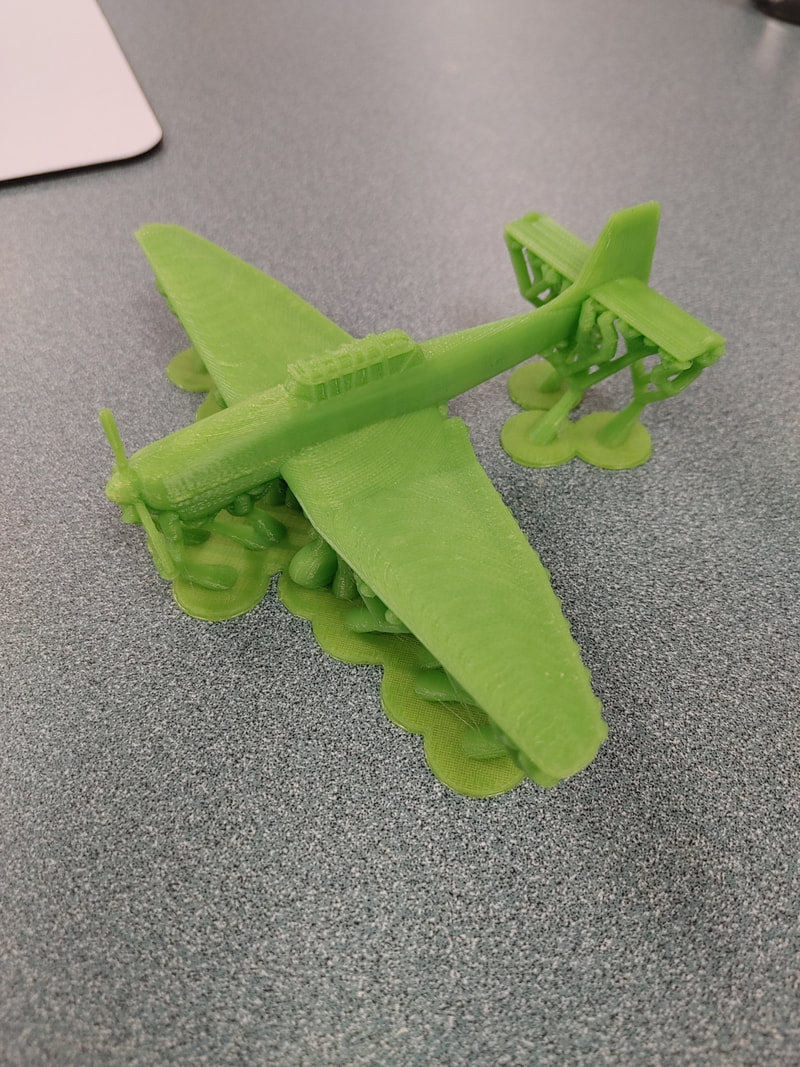
3D Printed Object
I chose to 3D print an aircraft. While being printed, supports were created to help make the whole aircraft be formed correctly. A lot of supports were needed, as most of the plane was not touching the ground. This is a photo of before the supports were cut off of the object.
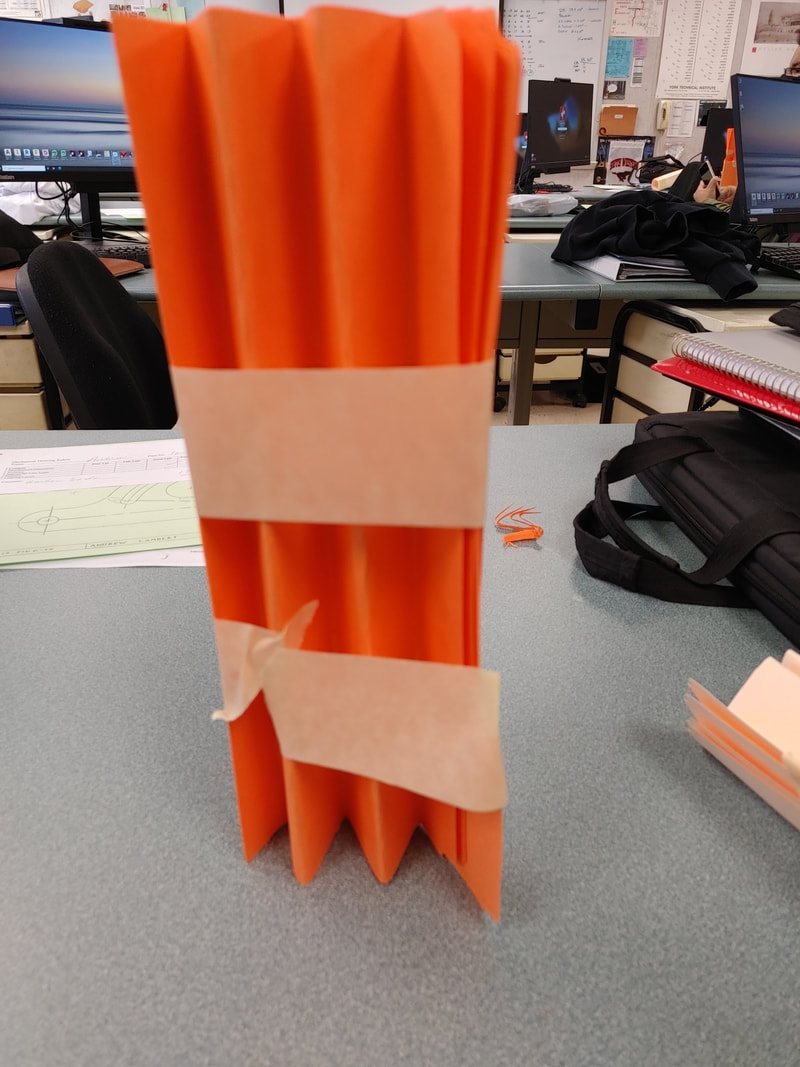
Tower
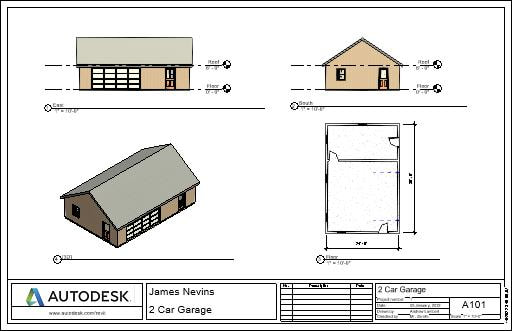
Revit Drawing
Revit is a software that is used for architecture. It has multiple ways to view the drawing, such as 3D and views from the sides. It has a library of pieces for the building being designed, such as doors, windows, and garage doors. We used it to draw a 2 car garage from the specifications given, and from teacher instruction.
Architect Presentation
I did a presentation on the architect Walter Gropius. I chose him because his work looked interesting to me. I conducted research about his life, his education, and his work.
Conclusion
Overall, I see taking this class as a good use of time. I learned about something I would not have learned otherwise, which I can also use in future classes where creating something is part of an assignment. What I learned was interesting and I would be interested in learning more in the future.
